Before starting this tutorial, please make sure you’ve at least completed steps 1 through 8 from the previous tutorial.
In this tutorial, I will be using a model created by Emmie for her Odyssey project. This particular character is called a siren.
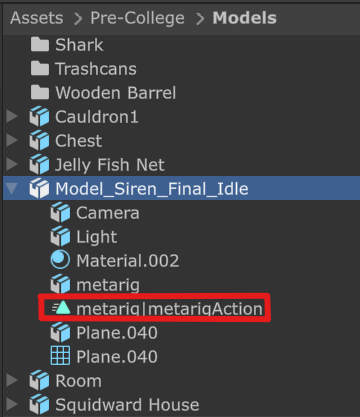
Step 1: Ensure your animation is included in the .fbx file you imported. You can do so by making sure there is at least 1 metarigAction clip in your .fbx file. If there is not, then redo the previous tutorial or ask for help in the discord.
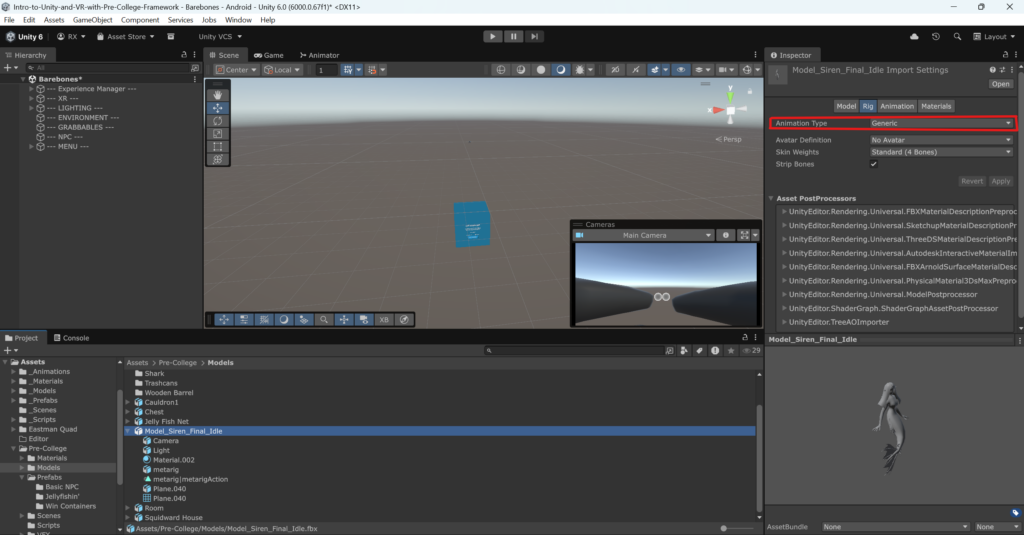
Step 2: Select your model, and in the inspector, make sure your Animation Type is set to Generic in the Rig tab.
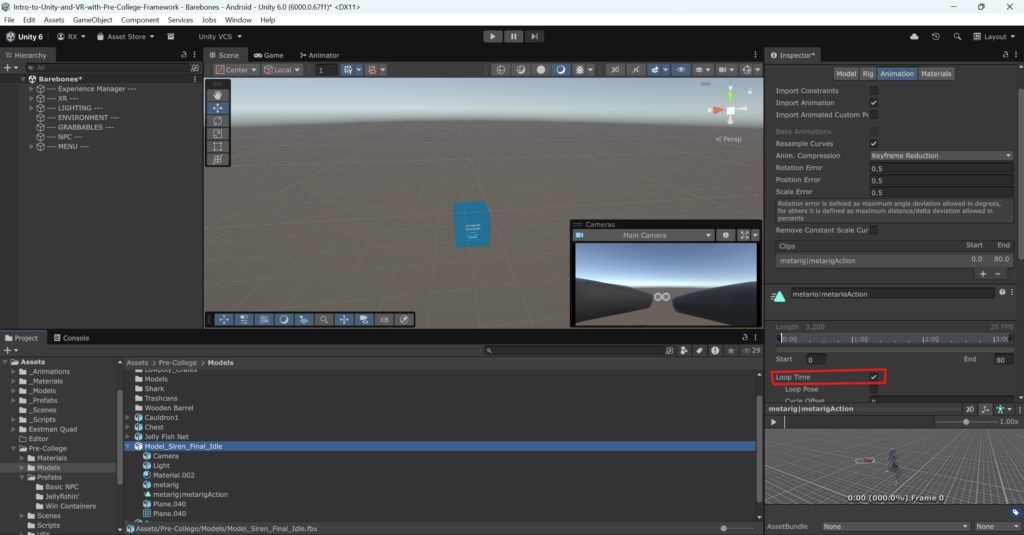
Step 3: If you want your animation to loop continuously, then you can select the Animation tab and set Loop Time to true by checking the box in the Animation tab:
Step 4: Create an Animation Controller. In your project window, click the + icon.
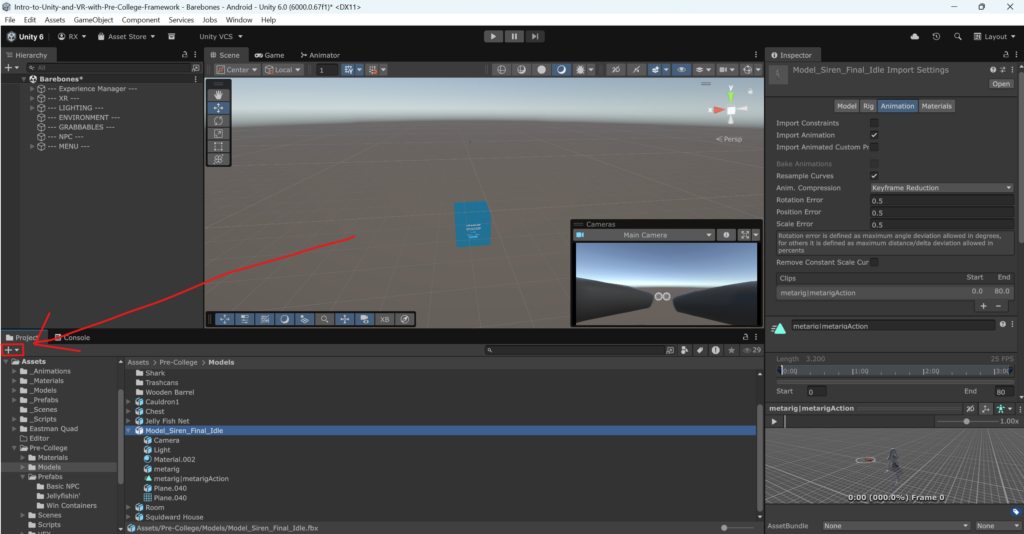
Then, select Animation -> Animation Controller.
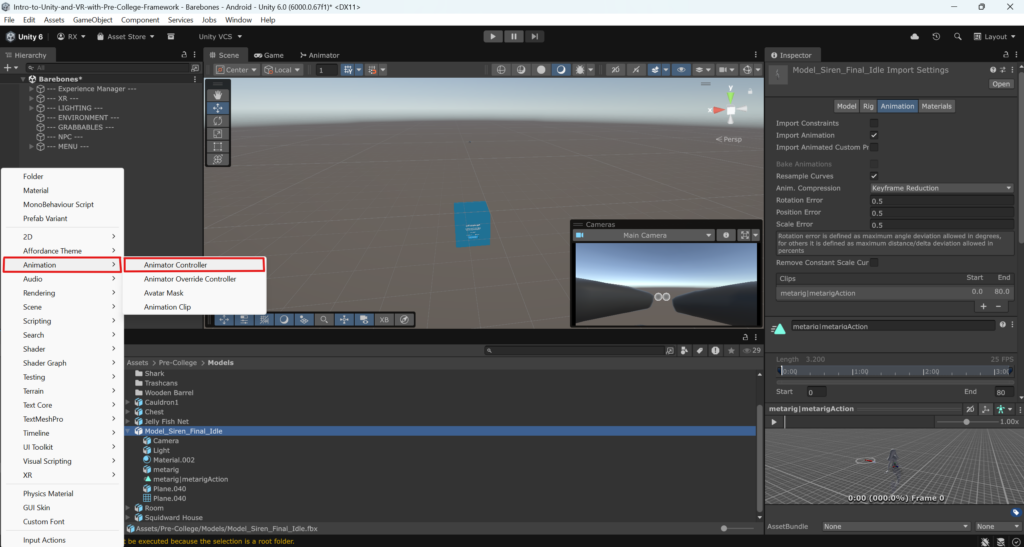
Rename your animation controller to whatever you like. I renamed mine to Siren Animation Controller.
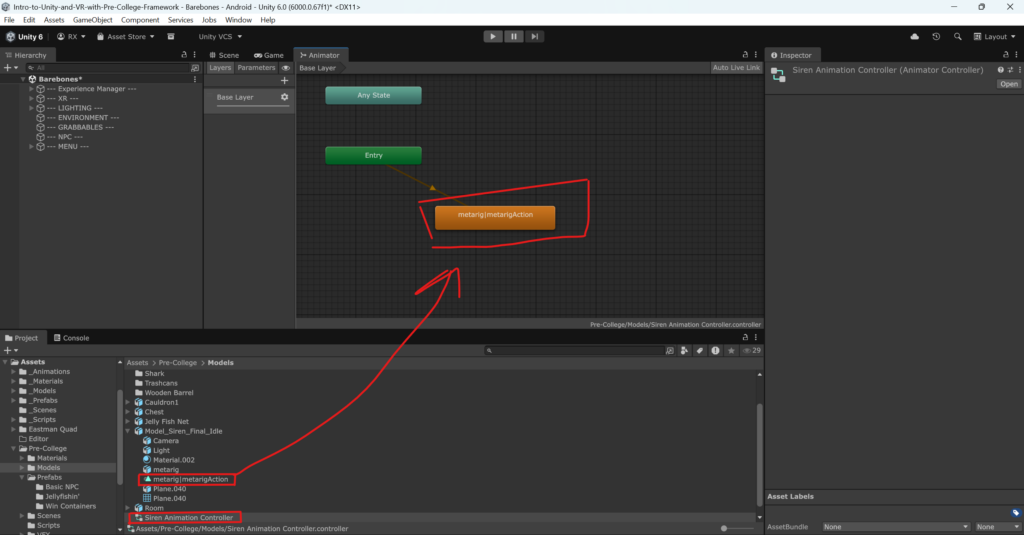
Double click the animation controller to open it, then drag your metarigAction into the Animator window.
Step 5: Drag your model into your Unity scene, add an Animator component to it, and assign the Controller as the Animation Controller you made in the last step.
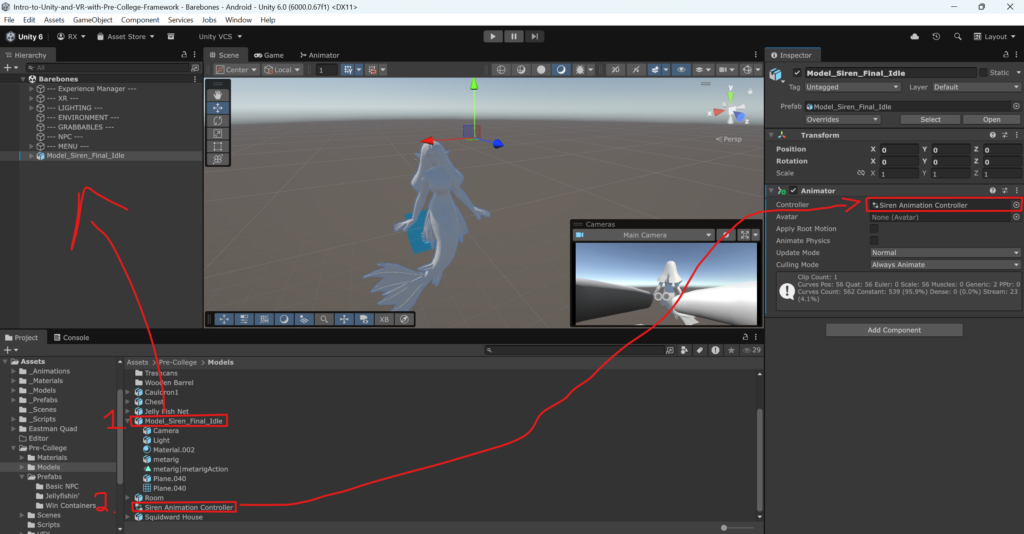
Step 6: Enter play mode, and make sure your model is animated! If it is not, ask for help in the discord.
Step 7: Next Steps.
To learn how to take advantage of the Animation Controller: https://learn.unity.com/pathway/creative-core/unit/animation/tutorial/control-animation-with-an-animator?version=6.0
Leave a Reply