Step 1: Check the pre-made win containers to see if there are any that will match your experience.
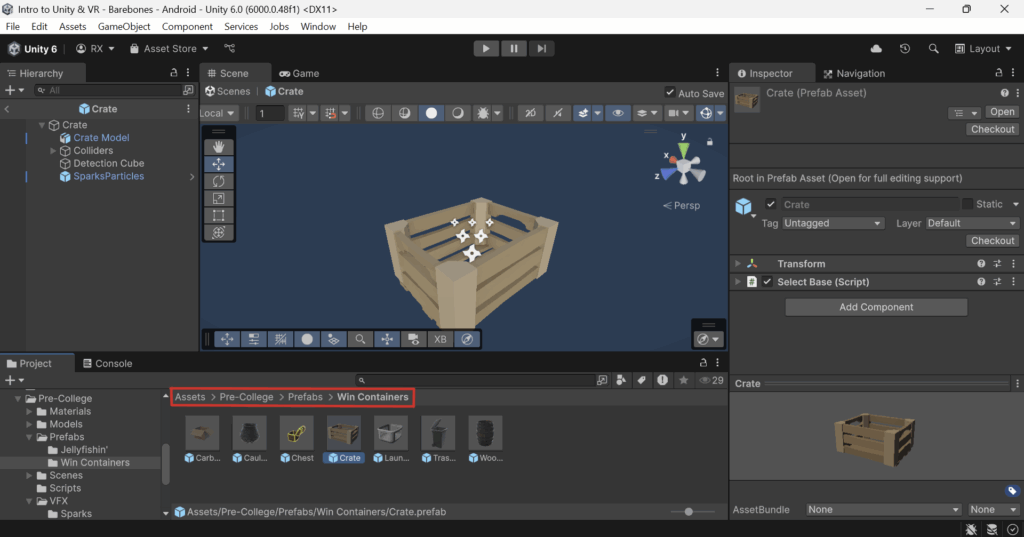
In this project, we have given you pre-made win containers that you can use. These are located in Assets/Pre-College/Prefabs/Win Containers in the Project Window.
If you like one of the already existing win containers, then there’s no need to continue this tutorial! Just drag the prefab you like into your scene.
Step 2: If you want to make your own Win Container
- Create an empty
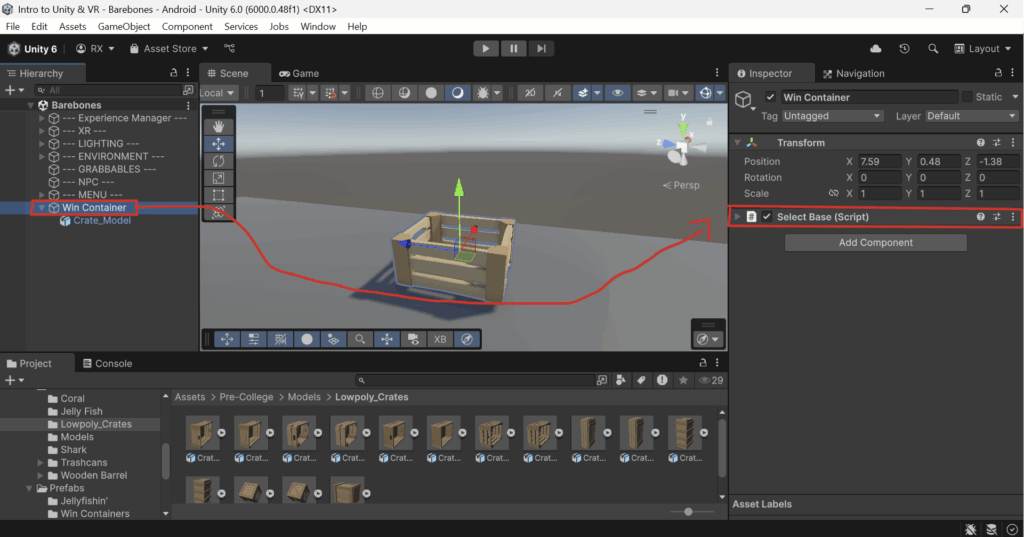
GameObjectin your scene (I will name mineWin Container).- Depending on what kind of
Win Containeryou are trying to make, you may or may not want to add aRigidbodyto the parentGameObjectyou just made. - For a non-moving stationary box like in the following example, it is not required.
- Depending on what kind of
- Add your model to the
GameObjectyou just made as a childGameObject(I’m going to use the crate model).
(Optional, but recommended) Add the Select Base component to your parent GameObject.
This is a component that simply prioritizes selecting the object it is attached to when clicking on an object in the Scene View. With this component attached to your parent GameObject, when you click on its child model, it will select the parent GameObject rather than the model’s GameObject.
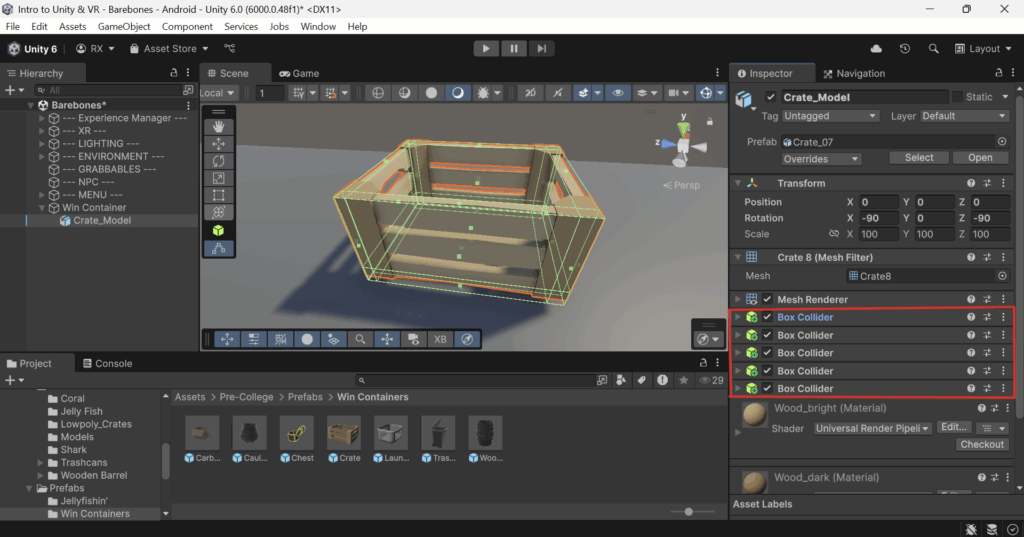
Step 3: Ensure that you have collider(s)for your Win Container.
Reminder: For more complex models, you can have multiple colliders on one GameObject.
Step 4: Make a trigger cube.
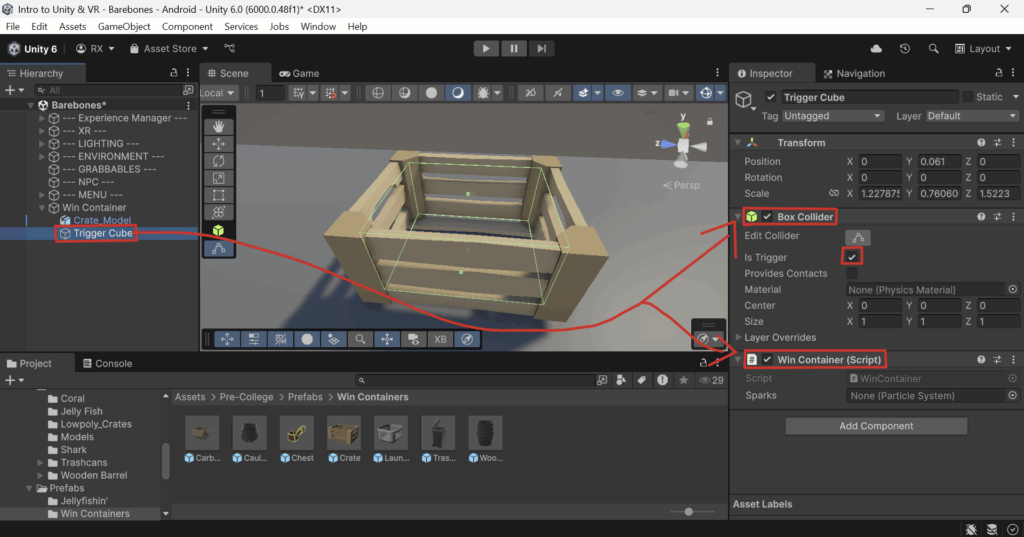
This GameObject will detect if a Win Object enters it.
- Make a new empty
GameObjectand give it aBox Collider. - On the
Box Collidercomponent, enable theIs Triggervariable.- This disables normal physical collisions for this collider and has it act as just a sensor for coming into contact with other colliders.
- Adjust the
Box Collideruntil it covers the empty space of the win container. - Add the
Win Containercomponent to theGameObject. - Your
Win Containershould now be fully functional!- Don’t forget to make it a
Prefabby dragging it from theHierarchy Windowinto theAssets/_Prefabsfolder in theProject Window.
- Don’t forget to make it a
Step 5 (Optional): Add sparks that fly out whenever a Win Object is placed in the Win Container.
- Add the
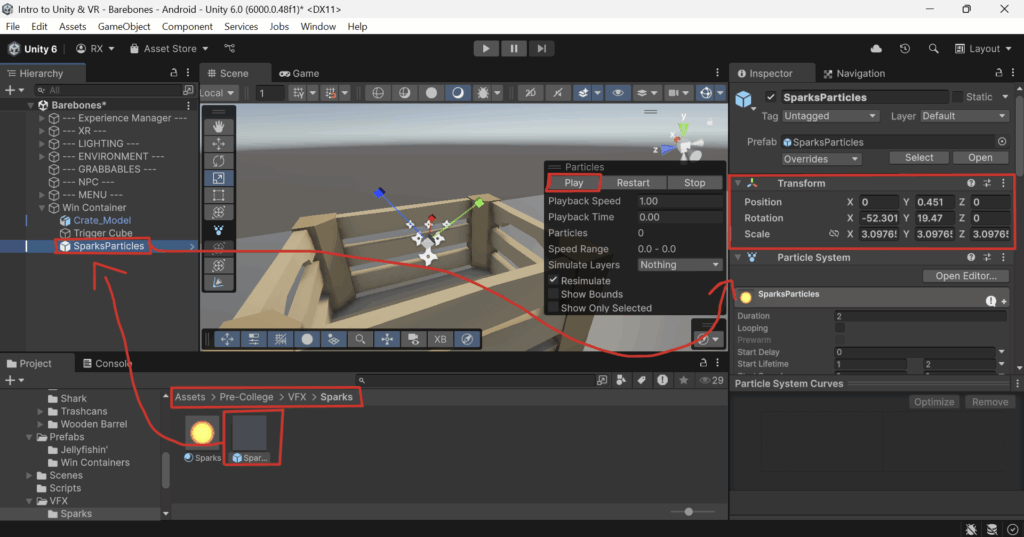
SparksParticlesprefab fromAssets/Pre-College/VFX/Sparksto yourWin Container‘s parentGameObject. - Select the
SparksParticlesin theHierarchy Window, and reset theTransform‘s position values to0,0,0in theInspector Window. - Test the
Particle Systemby clicking thePlaybutton in theScene View. - Adjust the
Position,RotationandScaleof theSparksParticlesobject. - Assign the
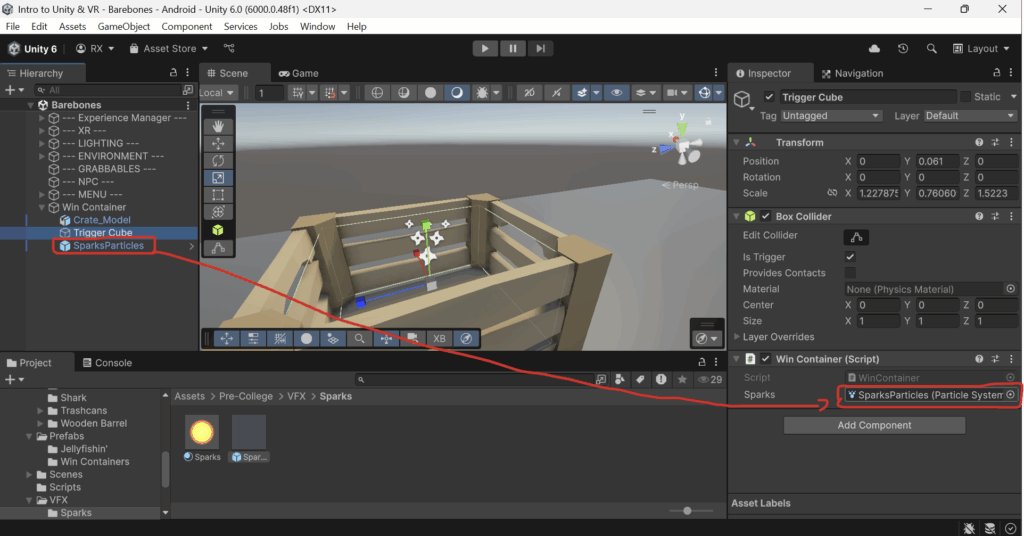
SparksParticlesobject to theSparksvariable in theWin Containercomponent in yourTrigger Cubeobject.
Next Steps: