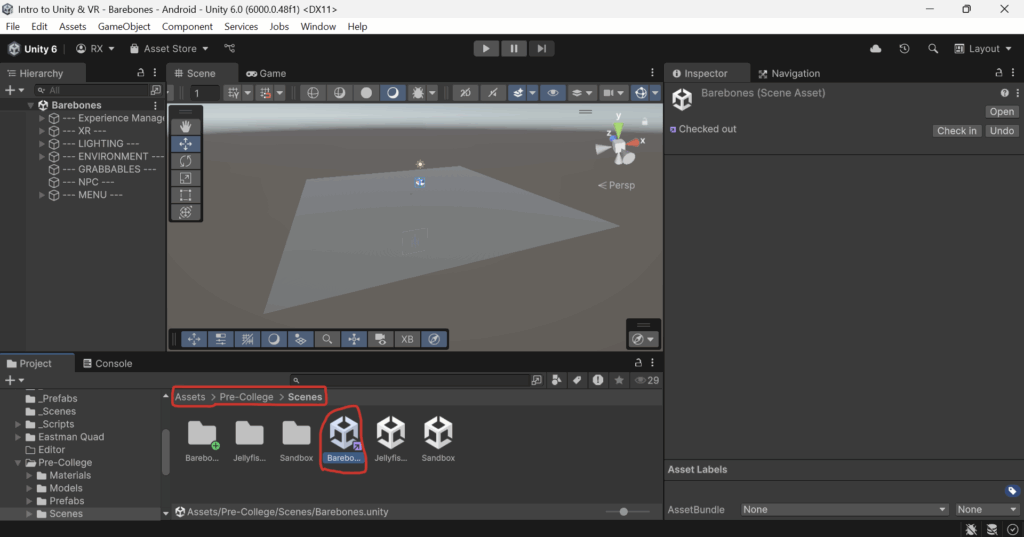
Step 1: In Unity, navigate to the Barebones scene located in Assets/Pre-College/Scenes/Barebones. This is the scene in which you will create your own VR experience.
This scene is set up and pre-configured with:
XR OriginXR Controls Manager
Main MenuExperience Manager
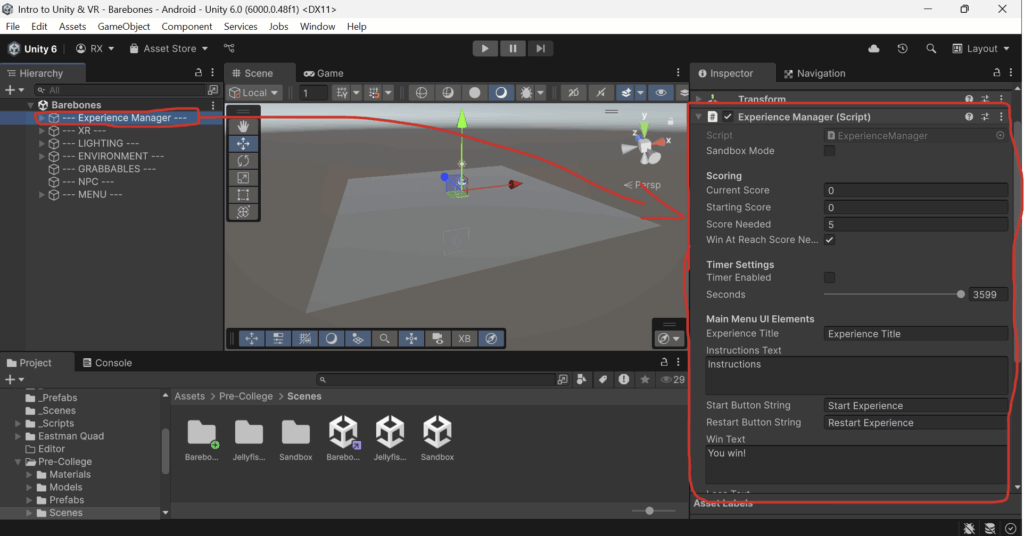
Step 2: Set up your Experience Manager.
- Select the
--- Experience Manager ---GameObject. - In the
Inspector Window, edit the values in theExperience Managerscript to match your experience/game.
Explanation of the variables in the Experience Manager
Sandbox Mode- When this is enabled, it will skip the menu and put the player right into the experience. The player will not be able to win or lose. Useful for testing purposes.
Current Score- Keeps track of the player’s current score. Don’t change this variable, it’s only here so it is visible to you during playtesting.
Starting Score- The score value your player will start with.
Score Needed- The score value needed for your player to “win” your experience.
Win At Reach Score Needed- If this is enabled, right when your player reaches the
Score Needed, the player will have won and the experience will be over. - Disabling this variable only makes sense if you have the
Timerenabled in your experience. - Disabling this variable allows your player to get more points than the
Score Needed. This would be useful if you want your players to get a “high score”.
- If this is enabled, right when your player reaches the
Timer Enabled- Enables a timer. Once time is up, the experience will be over.
Seconds- How many seconds it takes for the experience to end.
- Only ends the experience if
Timer Enabledis enabled.
Main Menu UI Elements- These will replace the text items in the
Main Menu. - Your changes to these elements will only be visible during play mode.
- DO NOT edit the text items directly on the main menu. ONLY edit them here in the
Experience Manager.
- These will replace the text items in the
Spawn Point- Reference to where to spawn the player once they leave the
Main Menu. - You can move the
Spawn PointGameObjectto wherever you would like your player to start the experience at.
- Reference to where to spawn the player once they leave the
Disable Toggling Controls- Allows you to disable UI Elements for toggling Teleportation, Smooth/Snap Turn, and Continuous Movement.
- For example, if you do not want your player to be able to turn teleportation on/off, you would enable the
Disable Teleportation Togglevariable.
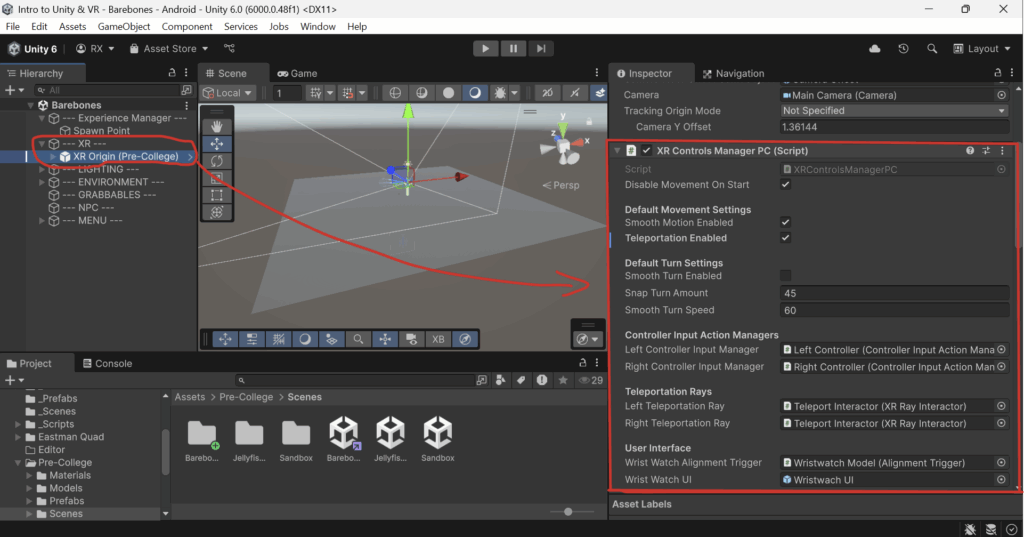
Step 3: Set up your XR Controls Manager PC component.
- Select the
XR Origin (Pre-College)object, which is a child of the--- XR ---object. - Here, you can change the default movement and turning settings.
- DO NOT change the
Disable Movement On Startvariable.
Next Steps: