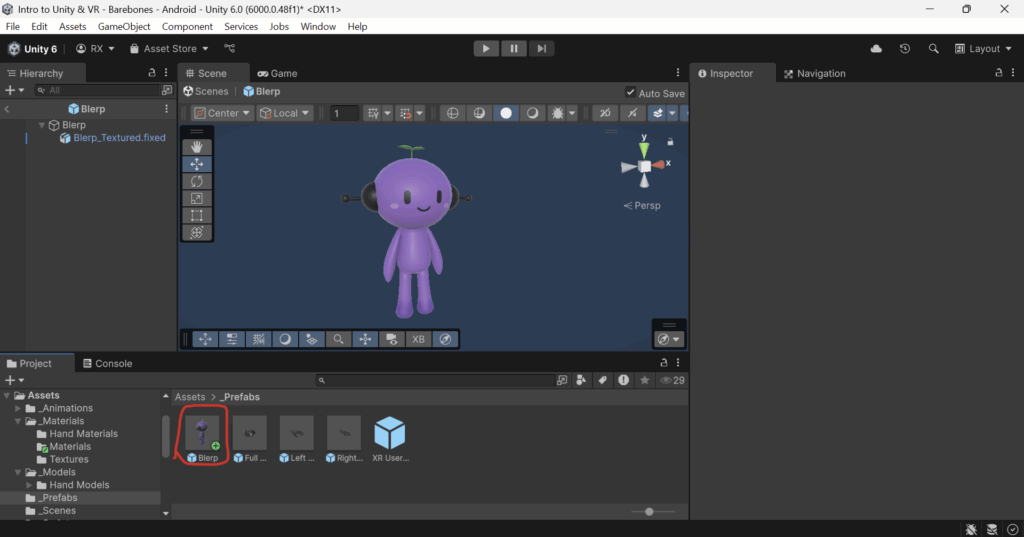
Step 1: Open your NPC’s Prefab by double-clicking it in the project window. If you don’t have a prefab of your NPC, follow this guide for importing your NPC from Blender into Unity.
You will know that you are in the prefab editor when the background in your scene view is blue.
Prefab Editor Mode
We are going to edit our NPC in prefab editor mode rather than directly in the scene because this allows us to make direct changes to the prefab. If we were to work in the scene instead, any changes we made to the prefab would later have to be saved to the prefab. Using prefab editor mode lets us skip that extra step and allows us to directly edit the prefab.
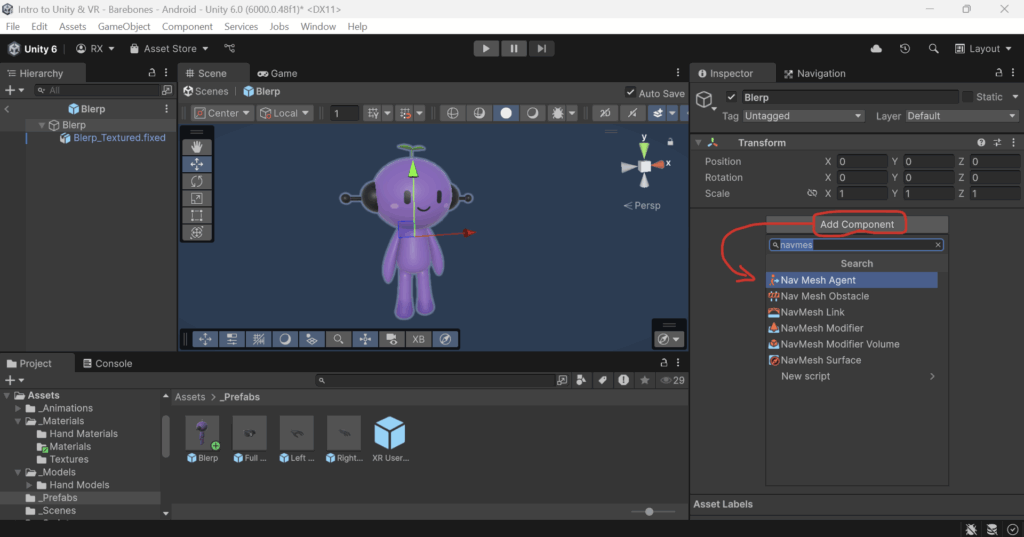
Step 2: Add the Nav Mesh Agent Component to your Prefab’s parent GameObject.
- Select the parent GameObject.
- In the
Inspectorwindow, clickAdd Component. - Search for
Nav Mesh Agentand select it.
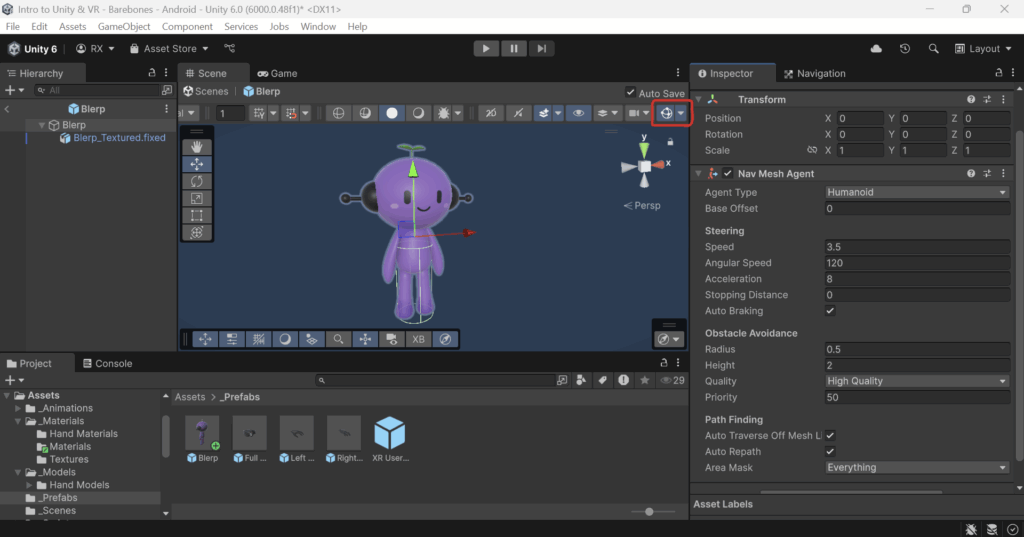
Step 3: Enable Gizoms so you can see your Nav Mesh Agent‘s Obstacle Avoidance green cylinder.
- Ensure that
Gizmosis on by clicking theGizmosicon in the toolbar. - Now when you have the parent
GameObjectselected, you should see a green cylindrical outline on your NPC.
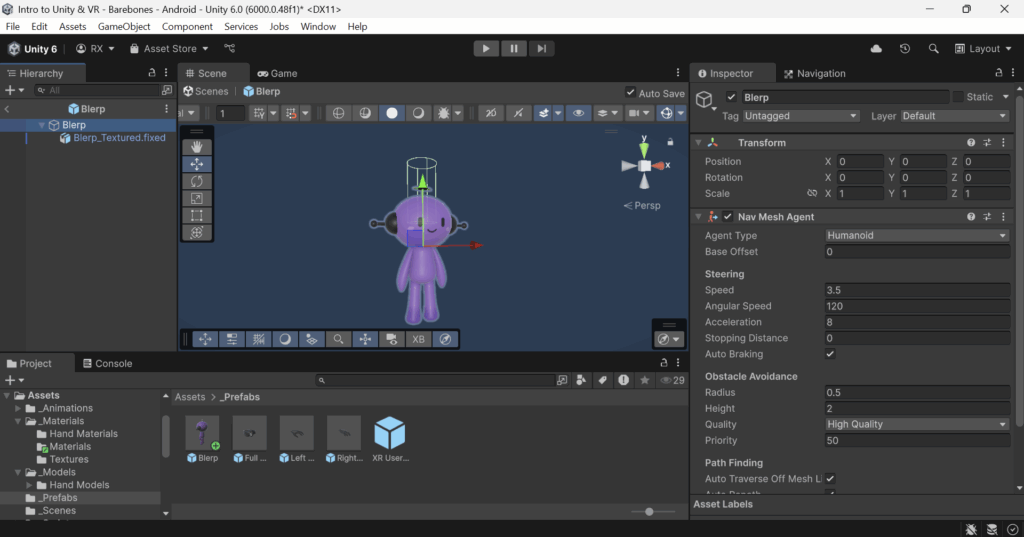
Step 4: Ensure that the bottom of the green cylinder matches the bottom of your NPC. If this is not already the case, follow these steps:
Why do we need to do this?
If you skip this step, then you may notice your NPC will be halfway in the ground when it tries to move during play mode. We need to ensure that the Nav Mesh Agent knows where our model’s feet are.
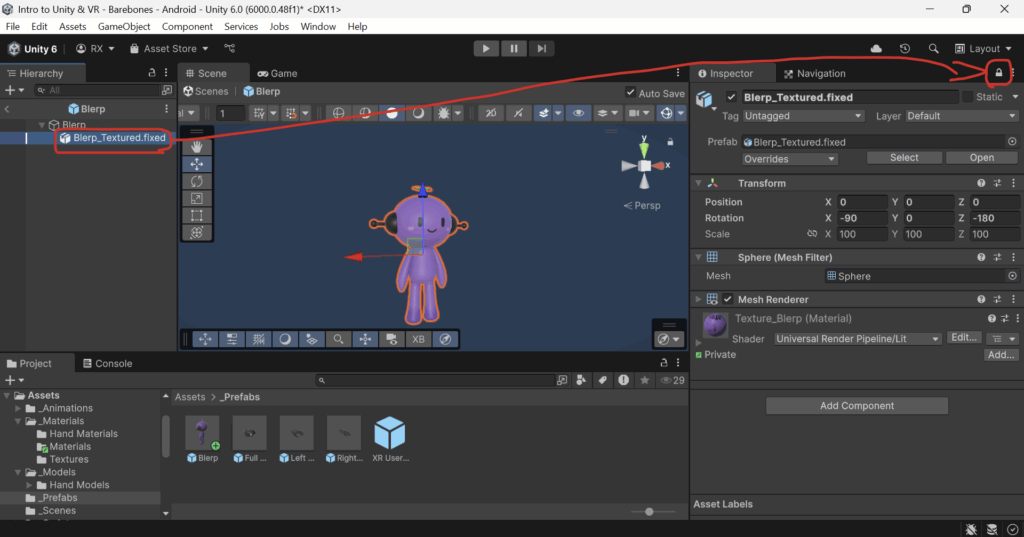
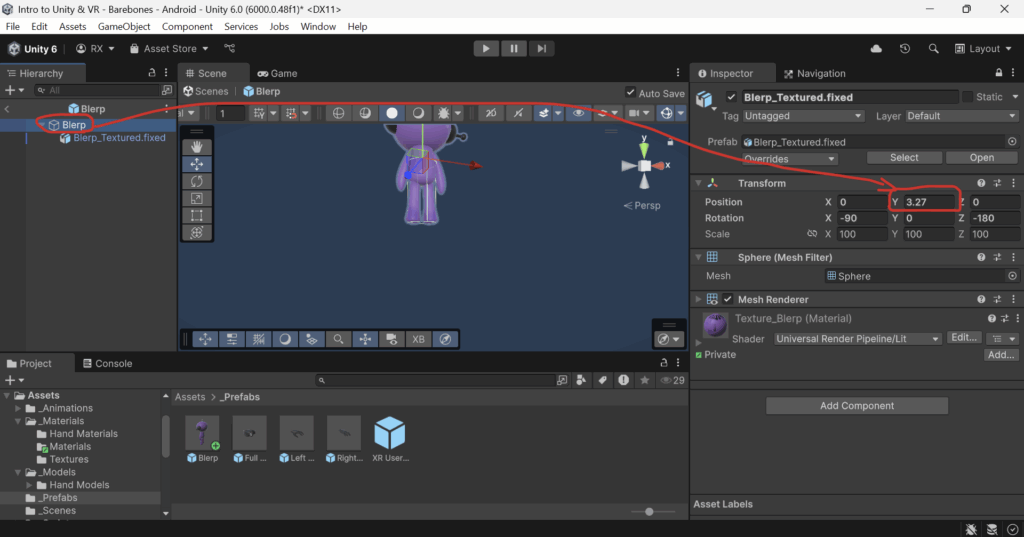
- Select the
GameObjectholding yourNPC‘s model. - Click the
Lockbutton in the inspector to lock the inspector to your model’sGameObject. - Select the parent
GameObject. - Adjust your model’s
Transform‘sYposition until the bottom of theNPCmatches that of the green cylinder. - Once you’ve finished, you can unlock the inspector by clicking the
Lockbutton again.
About locking the Inspector window.
Usually, when we select an object in the Hierarchy window, it also selects that object in the Inspector window. However, there are certain times when we want to be able to select a GameObject in the Hierarchy, but edit a different GameObject in the Inspector at the same time.
In this case, in order to see the green cylinder, we need to select the parent GameObject. However, we want to edit the child GameObject at the same time. So, we can lock the child GameObject in the Inspector, then select the parent GameObject, and edit the child GameObject at the same time.
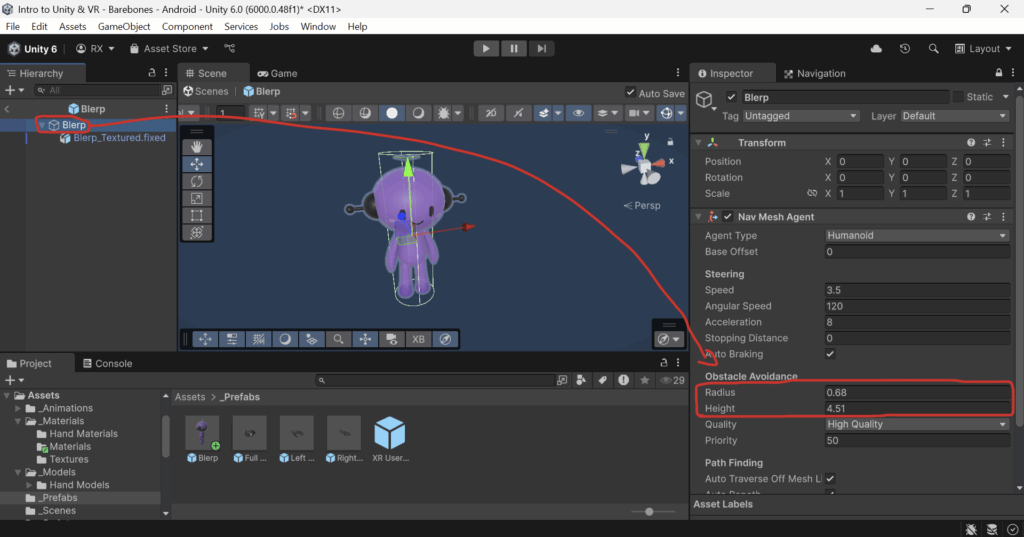
Step 5: Adjust the Radius and Height values of your Nav Mesh Agent‘s Obstacle Avoidance to match your NPC’s model.
- Select the parent
GameObject. - Adjust the
RadiusandHeightvalues until the green cylinder covers yourNPC
Tip: Don’t make your radius and height too big.
Making your radius and height too big can make it harder for your NPC to move around in tight spaces.
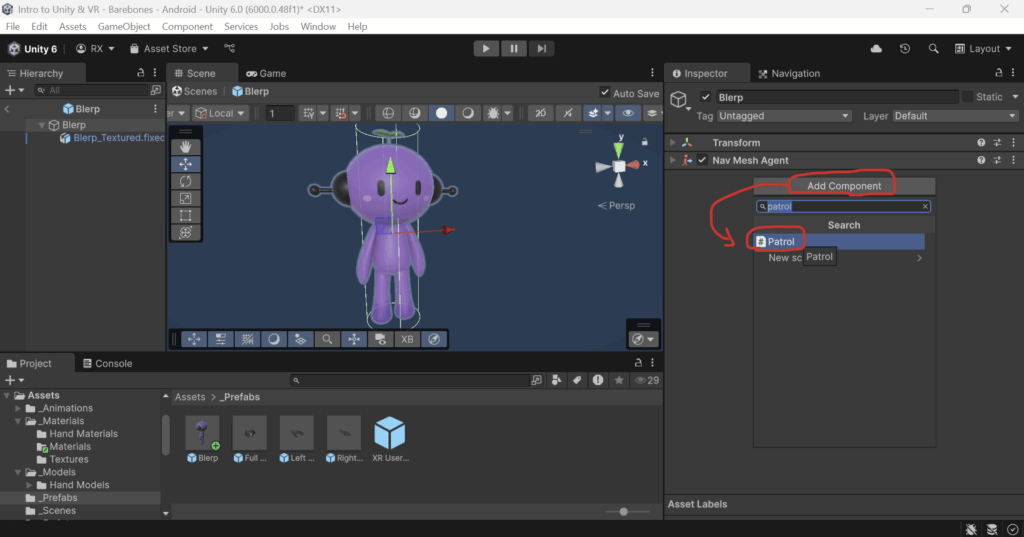
Step 6: Add the Patrol component to your NPC’s parent GameObject.
This will let us add points for the NPC to walk to later.
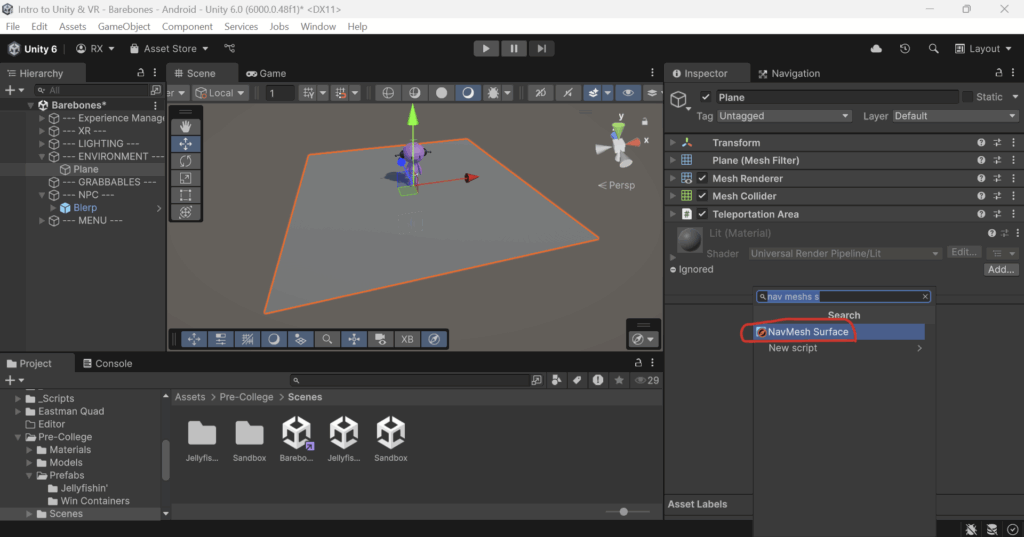
Step 7: Add and configure the Nav Mesh Surface component to your floor.
- Enter the scene you want to work in. If you don’t know which scene to work in, then enter the
Barebones Scenelocated inAssets/Pre-College/Scenes. - Select the floor your NPC will be traversing.
- In the
Inspector Window, clickAdd Component, then search for and add aNav Mesh Surfacecomponent. - Change the
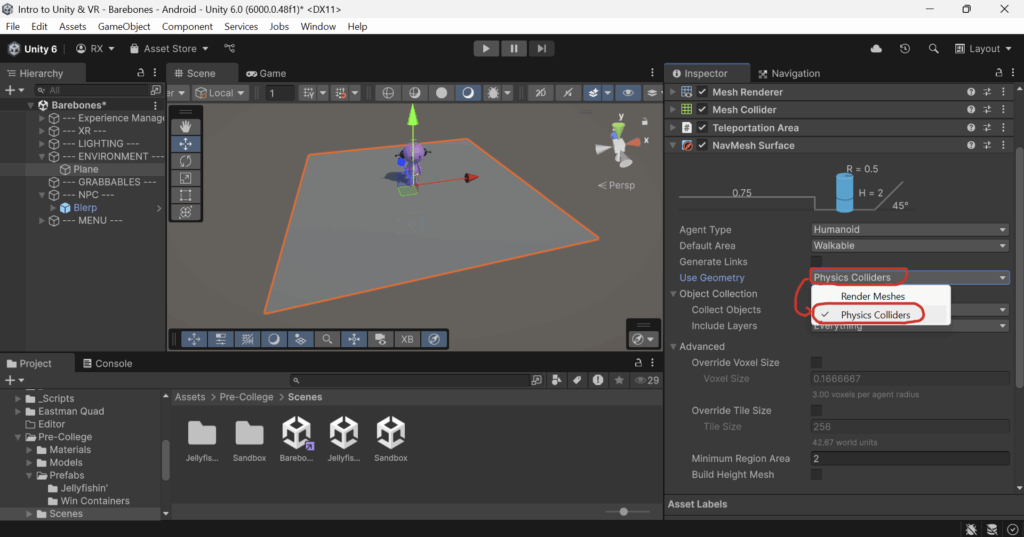
Use Geometryvariable in theNav Mesh Surfacecomponent fromRender MeshestoPhysics Colliders. - Click
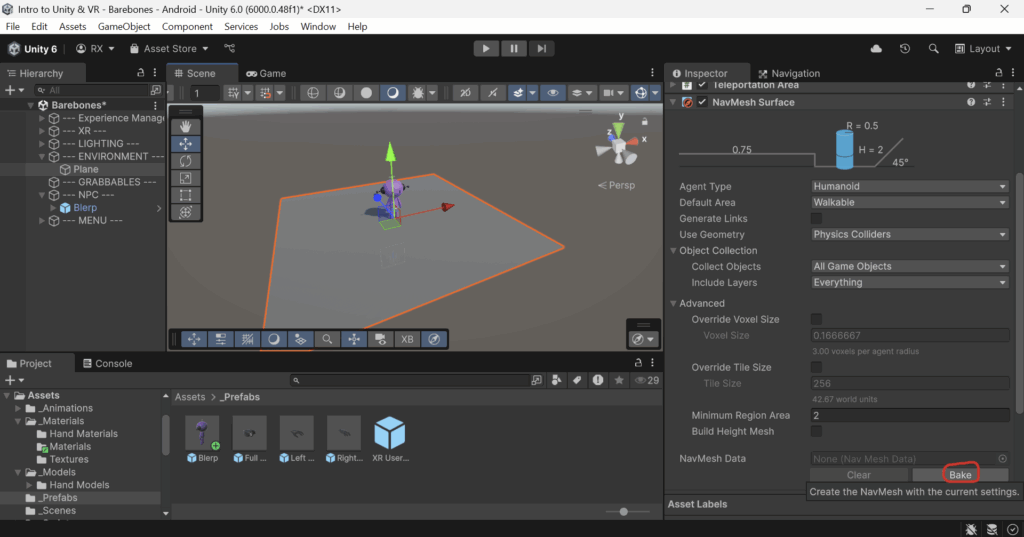
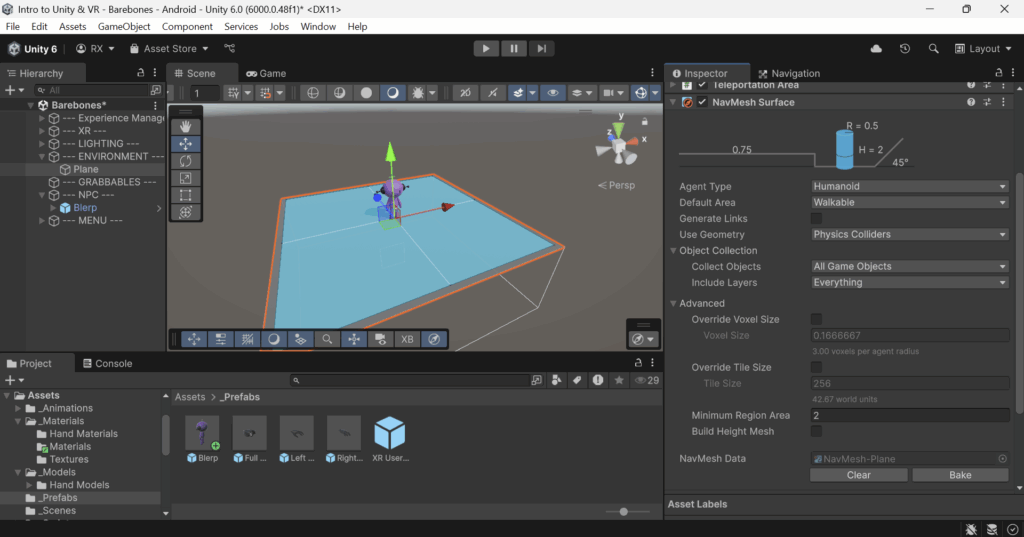
Bake(this process may take some time depending on how complex your floor is). - Once the
Bakeprocess is finished, withGizmoson, you should see blue spots on your floor. These areas are where your NPC is able to traverse.
Step 8: Add patrol points so your NPC can move around.
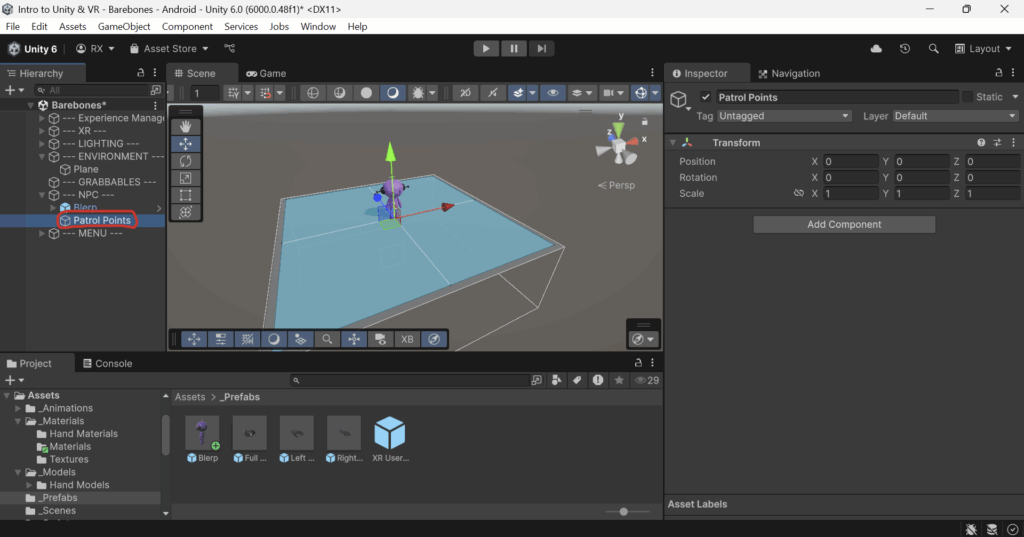
- In your
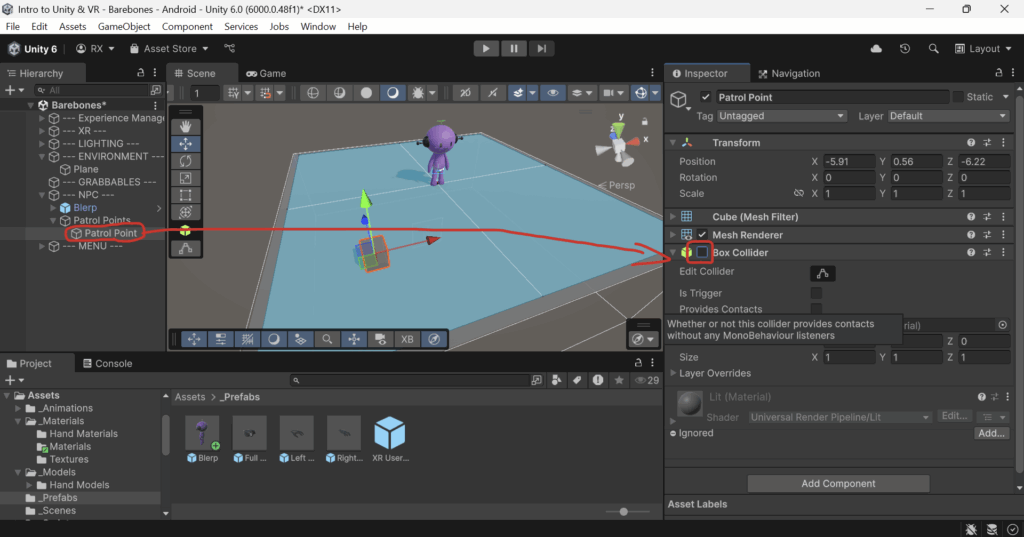
--- NPC ---folder, create a new emptyGameObjectcalledPatrol Points. - Create a new cube named
Patrol Point. Disable itsBox Collidercomponent. - Duplicate the
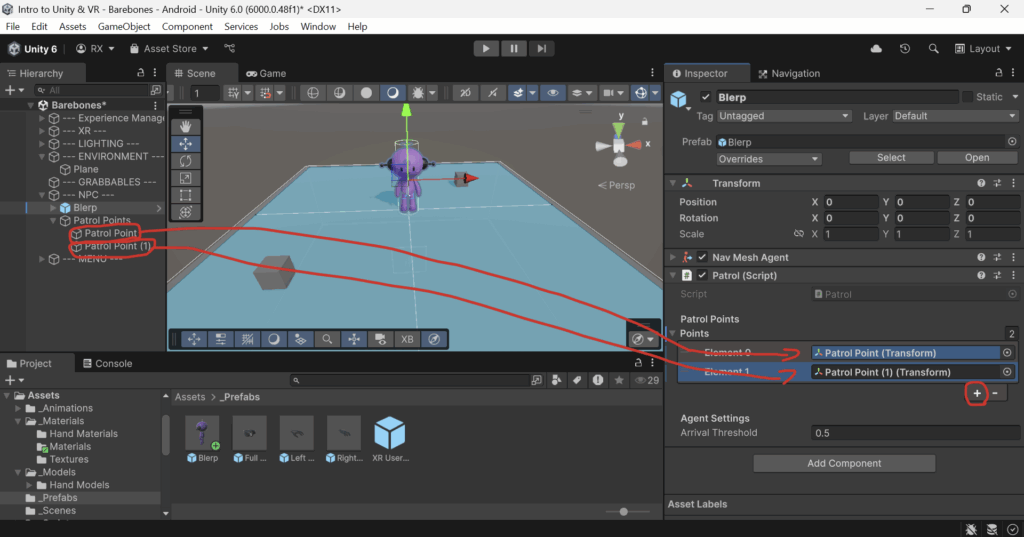
Patrol Pointobject you made by selecting thePatrol Pointobject and pressingControlandDon your keyboard. Then move your newPatrol Point (1)object to a different position. - Assign the
Patrol Pointobjects you made to thePointsvariable in thePatrolcomponent on your NPC’s parentGameObjectby clicking the plus (+) icon and dragging thePatrol PointGameObjectsfrom theHierarchy Windowinto theInspector Window. - Enter Play Mode, and switch back to scene view and observe your NPC moving between the points you assigned.
- You can disable the
Mesh Renderercomponent on yourPatrol Pointsso your player does not see them. It’s just useful to have them be visible while you’re developing.
Step 9 (Optional): Make it so that your player “Loses” when they come into contact with your NPC.
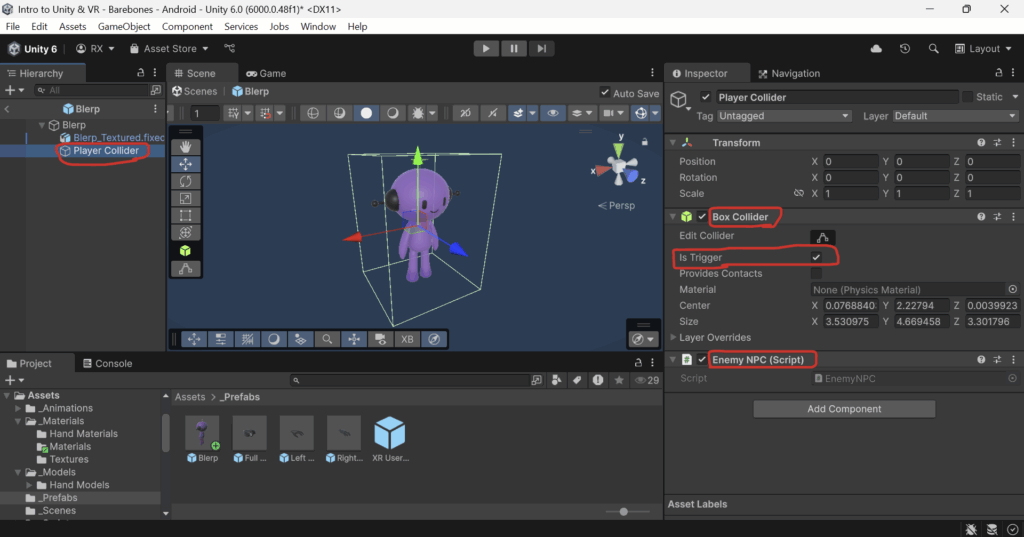
- Go back into prefab editing mode by double-clicking your NPC’s Prefab in the
Project Window. - Create a new empty
GameObjectand name itPlayer Collider. - Give it a
Box Collideror other collider depending on the shape you’d like to use, and edit the collider until it covers your whole NPC. - Enable the
IsTriggervariable in theCollidercomponent.- This disables normal physical collisions and has the collider act as just a sensor for coming into contact with other colliders.
- Add the
Enemy NPCscript to thePlayer ColliderGameObject. - When your player comes into contact with your NPC, the player should now “lose.” (Make sure that the
Sandbox Modevariable in yourExperience Manageris not enabled when testing this)
Next Steps: