Step 1: Open your NPC .blend file in Blender.
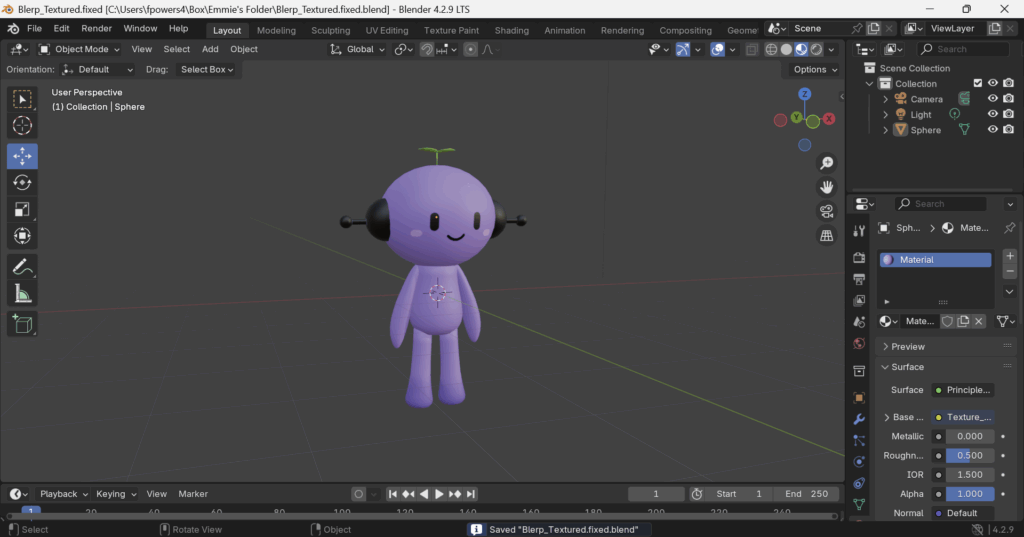
Step 2: Select your character’s model by clicking and dragging your mouse.
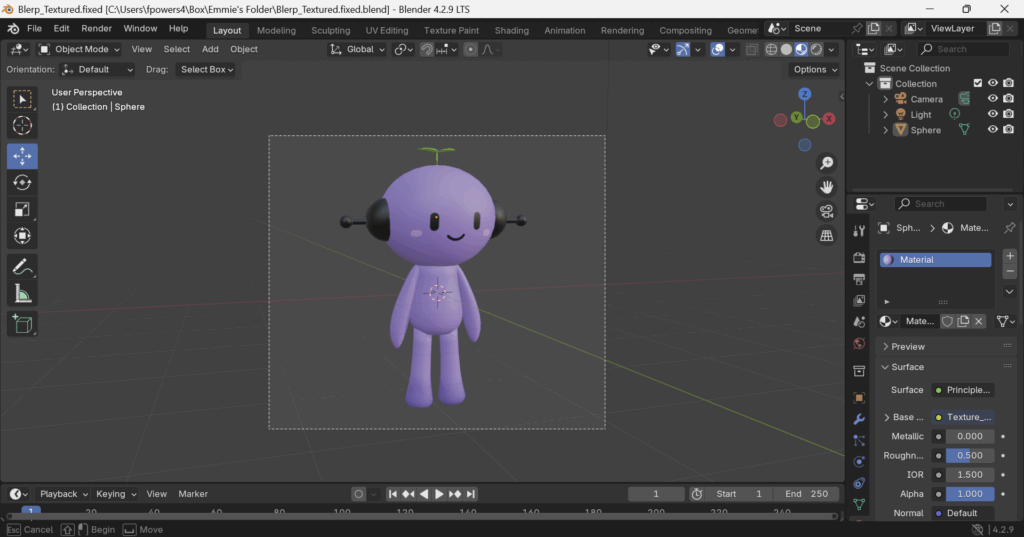
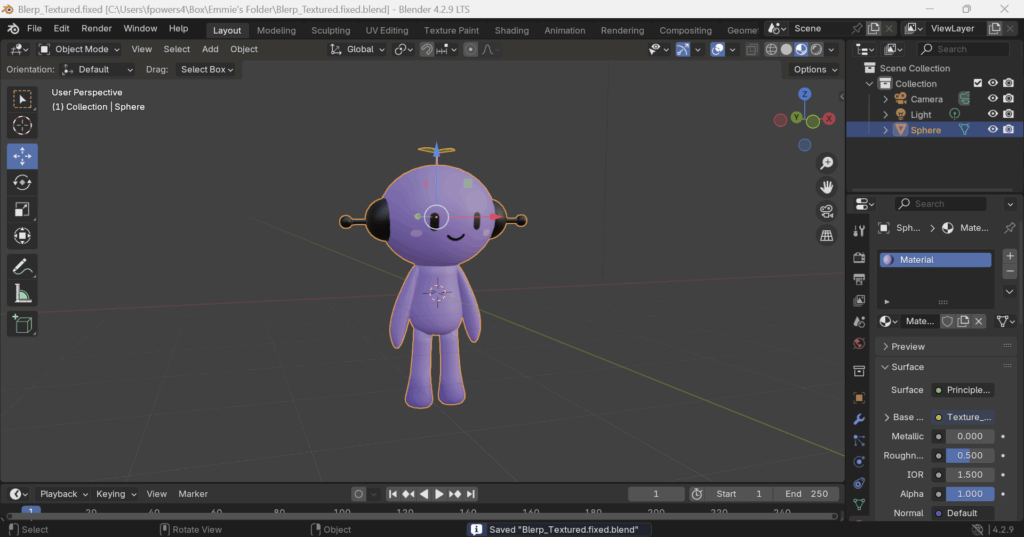
You will know your character is selected once it is fully outlined in orange.
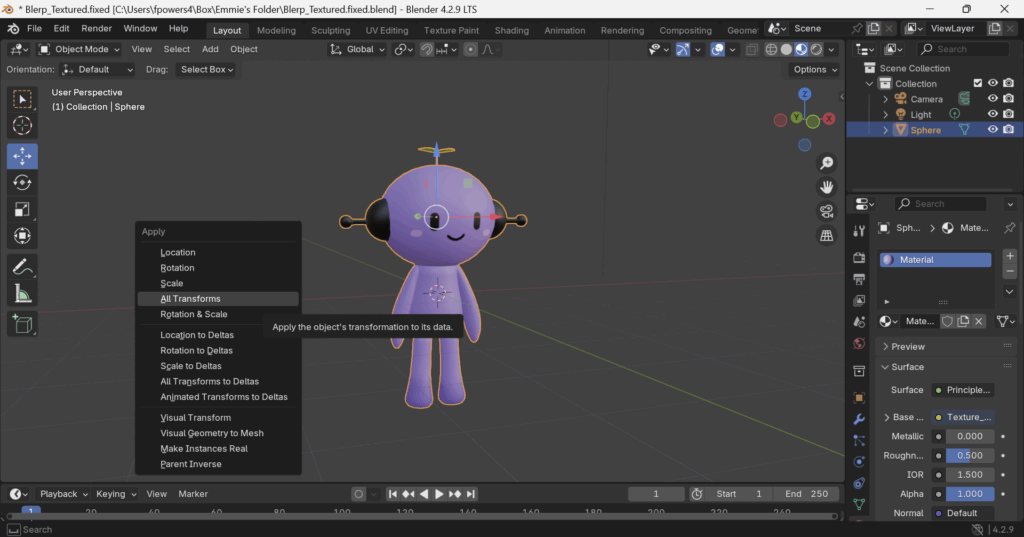
Step 3: Press the Control and A keys at the same time. Then, select All Transforms.
Explanation
This sets the model’s scale to 1,1,1 and rotation to 0,0,0. This is how Unity expects imported models to be.
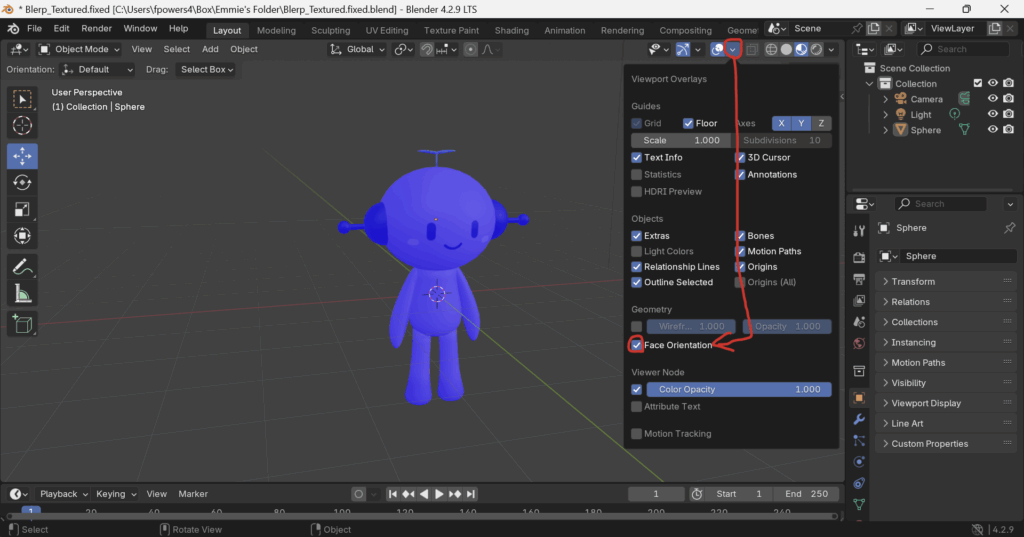
Step 4: Ensure Face Orientations are normal. Do this by entering the overlays menu and checking the Face Orientation setting. Your character should now be highlighted in blue (NOTE: In more recent versions of Blender, the blue highlight may not show up).
Move your view around your character and make sure there are no red highlights. If there are red highlights, see the Blender Tutorial How to Fix Face Orientations.
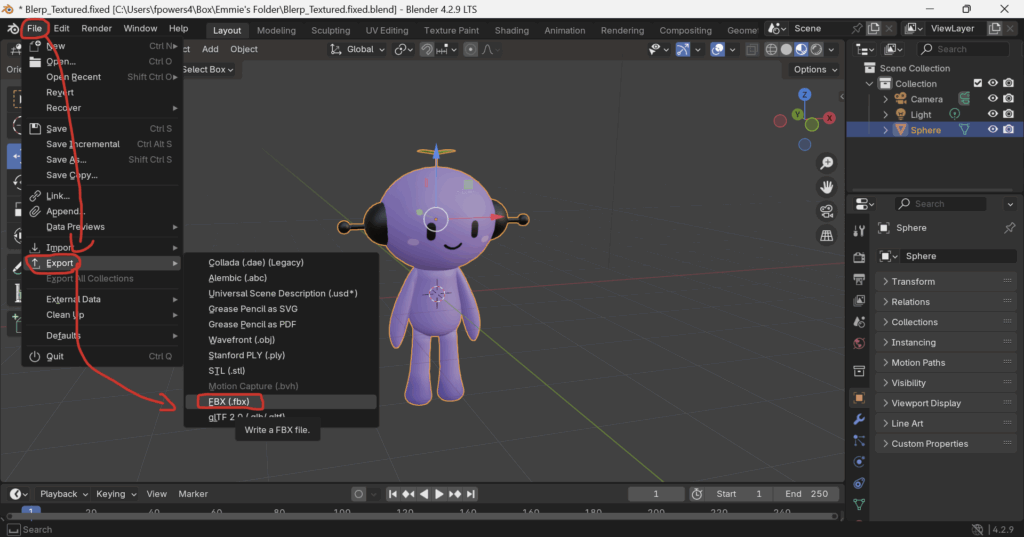
Step 5: While your model is selected, start the .fbx file export by going to File -> Export -> FBX (.fbx).
Explanation
Unity prefers the .fbx file format because it’s a stable, widely supported format that imports consistently, while .blend files rely on Blender’s background conversion, which can cause version or compatibility issues.
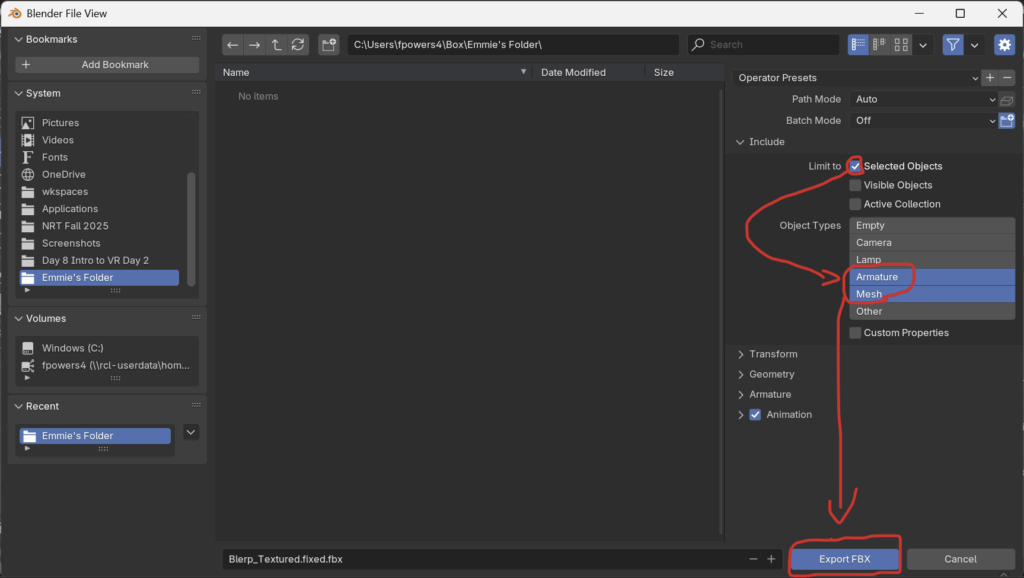
Step 6: Edit the export settings as so:
- Under
Include->Limit to, check the box forSelected Objects(make sure only your model is currently selected in blender). - Under
Include->Object Types, click the selections while holding theshiftkey down until onlyArmatureandMeshare left selected in blue.
Then, select Export FBX.
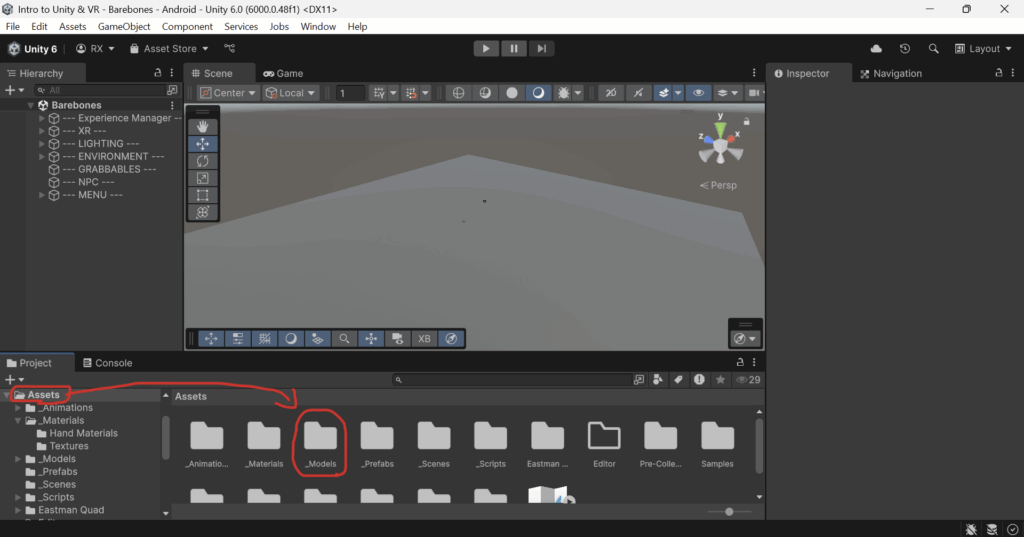
Step 7: Open Unity, and navigate to the Assets/_Models folder in the project folder. Double click the _Models folder to enter it.
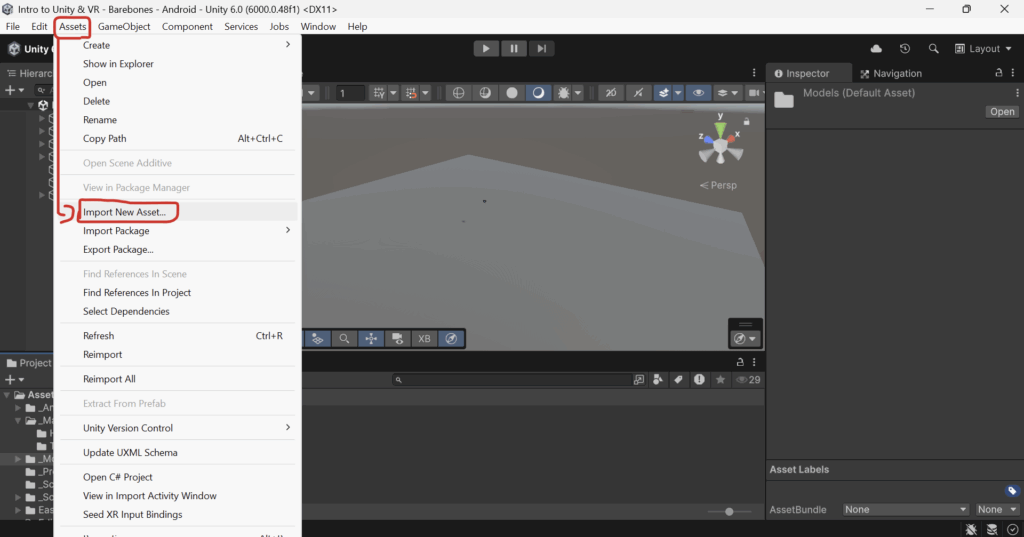
Step 8: Import the .fbx file into Unity by heading to Assets -> Import New Asset...
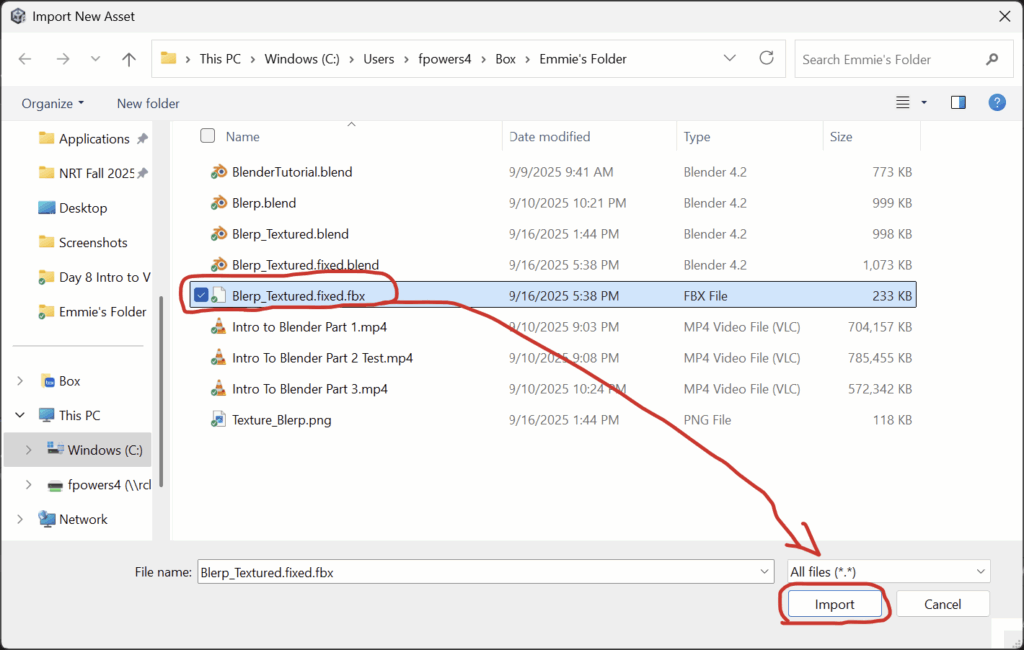
Then Select your .fbx file and click Import
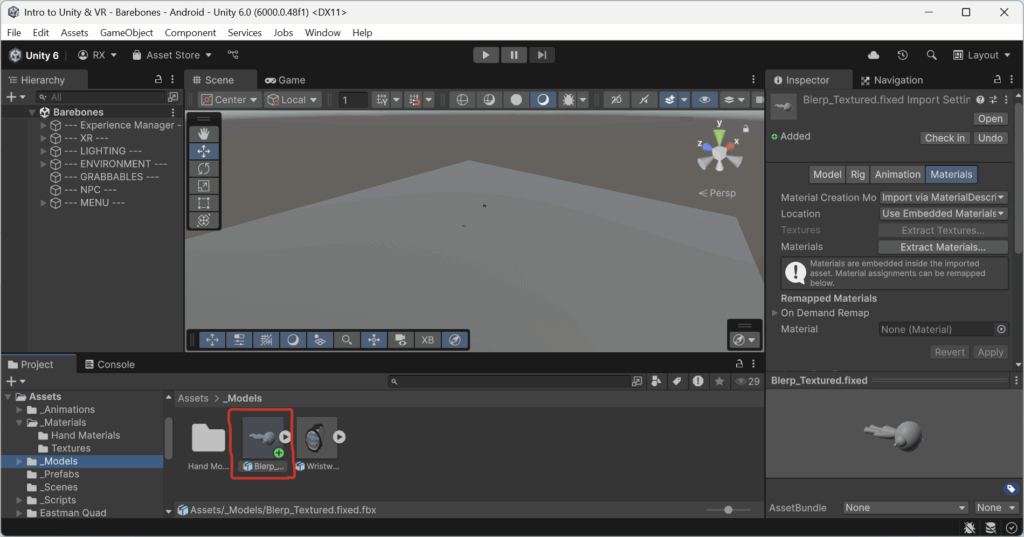
You should see your .fbx file in the _Models folder. If the .fbx file was placed in a different folder you can simply drag it into the _Models folder.
You will notice that your character’s textured material is not currently applied to your .fbx file. This is normal, and we will import the texture in a later step.
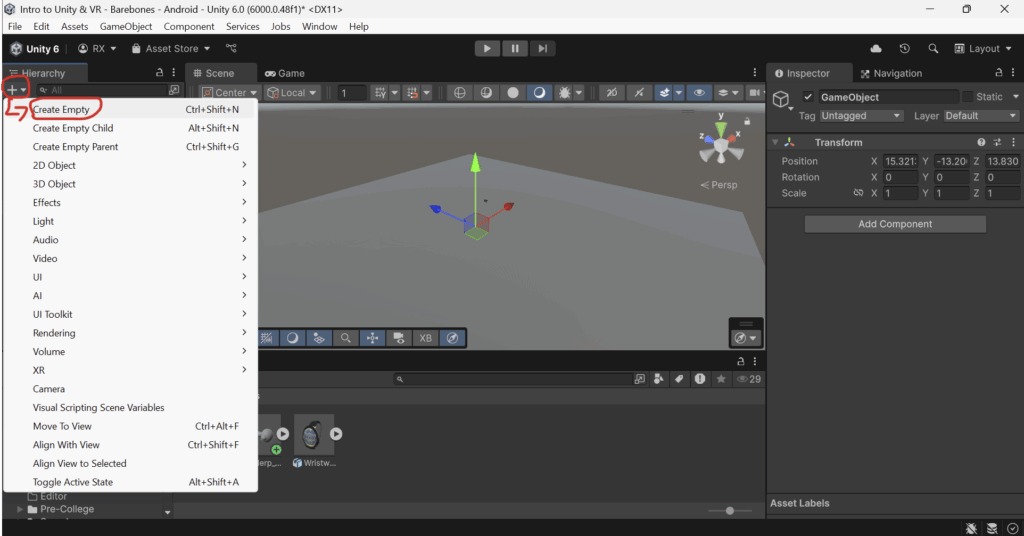
Step 9: Make a new Empty GameObject to hold your NPC model. Click the plus sign in the Hierarchy window, and then click Create Empty.
Rename the GameObject to whatever you like.
Step 10: Drag your model into the empty GameObject.
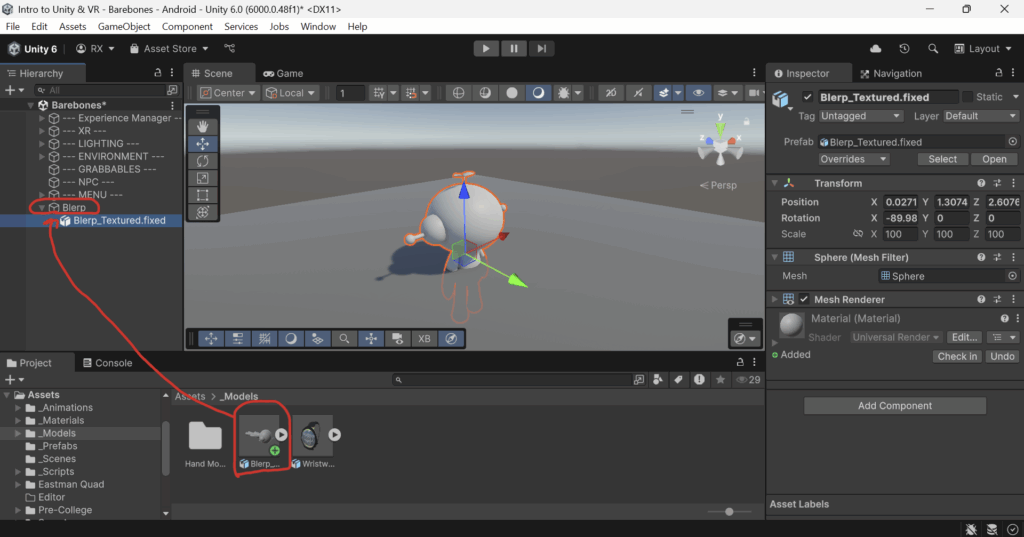
Step 11: Import the model’s texture.
- Navigate to the
Assets/_Materials/Texturesfolder in the project window. - Then, head to
Assets->Import New Asset...and import the.pngfile of your model’s texture. - Then, click and drag your texture from the project window onto your model in the scene view.
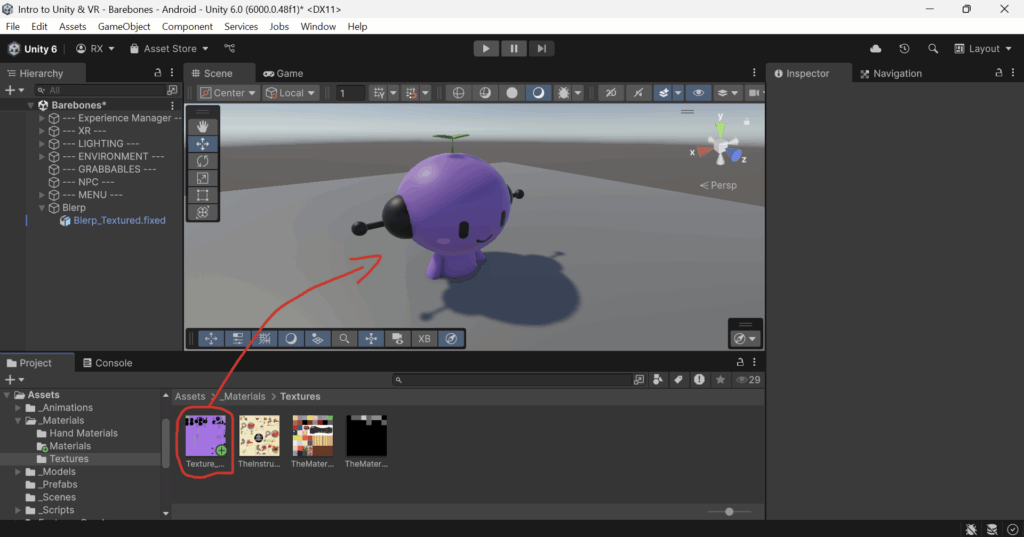
Step 12: Save your NPC as a Prefab by dragging it from the Hierarchy Window into the Assets/_Prefabs folder in the Project Window.
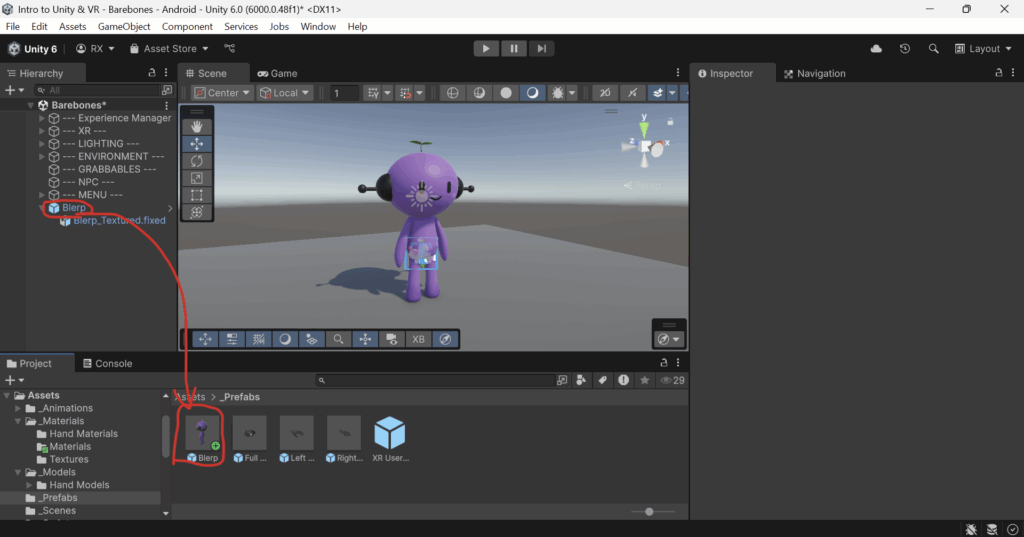
Next Steps:
- Follow this tutorial if you would like to have your NPC move around in your experience.